
How to install a home water purifier
How to install a home water purifier :
First of all, if you are going to install the device yourself, be sure to have enough knowledge to do this.
Now, if you are looking for a simple and efficient way to purify water in your home, this method will help you turn your home water into clean, refreshing, and healthy water and avoid additional costs for buying drinking water.
Basic instructions:
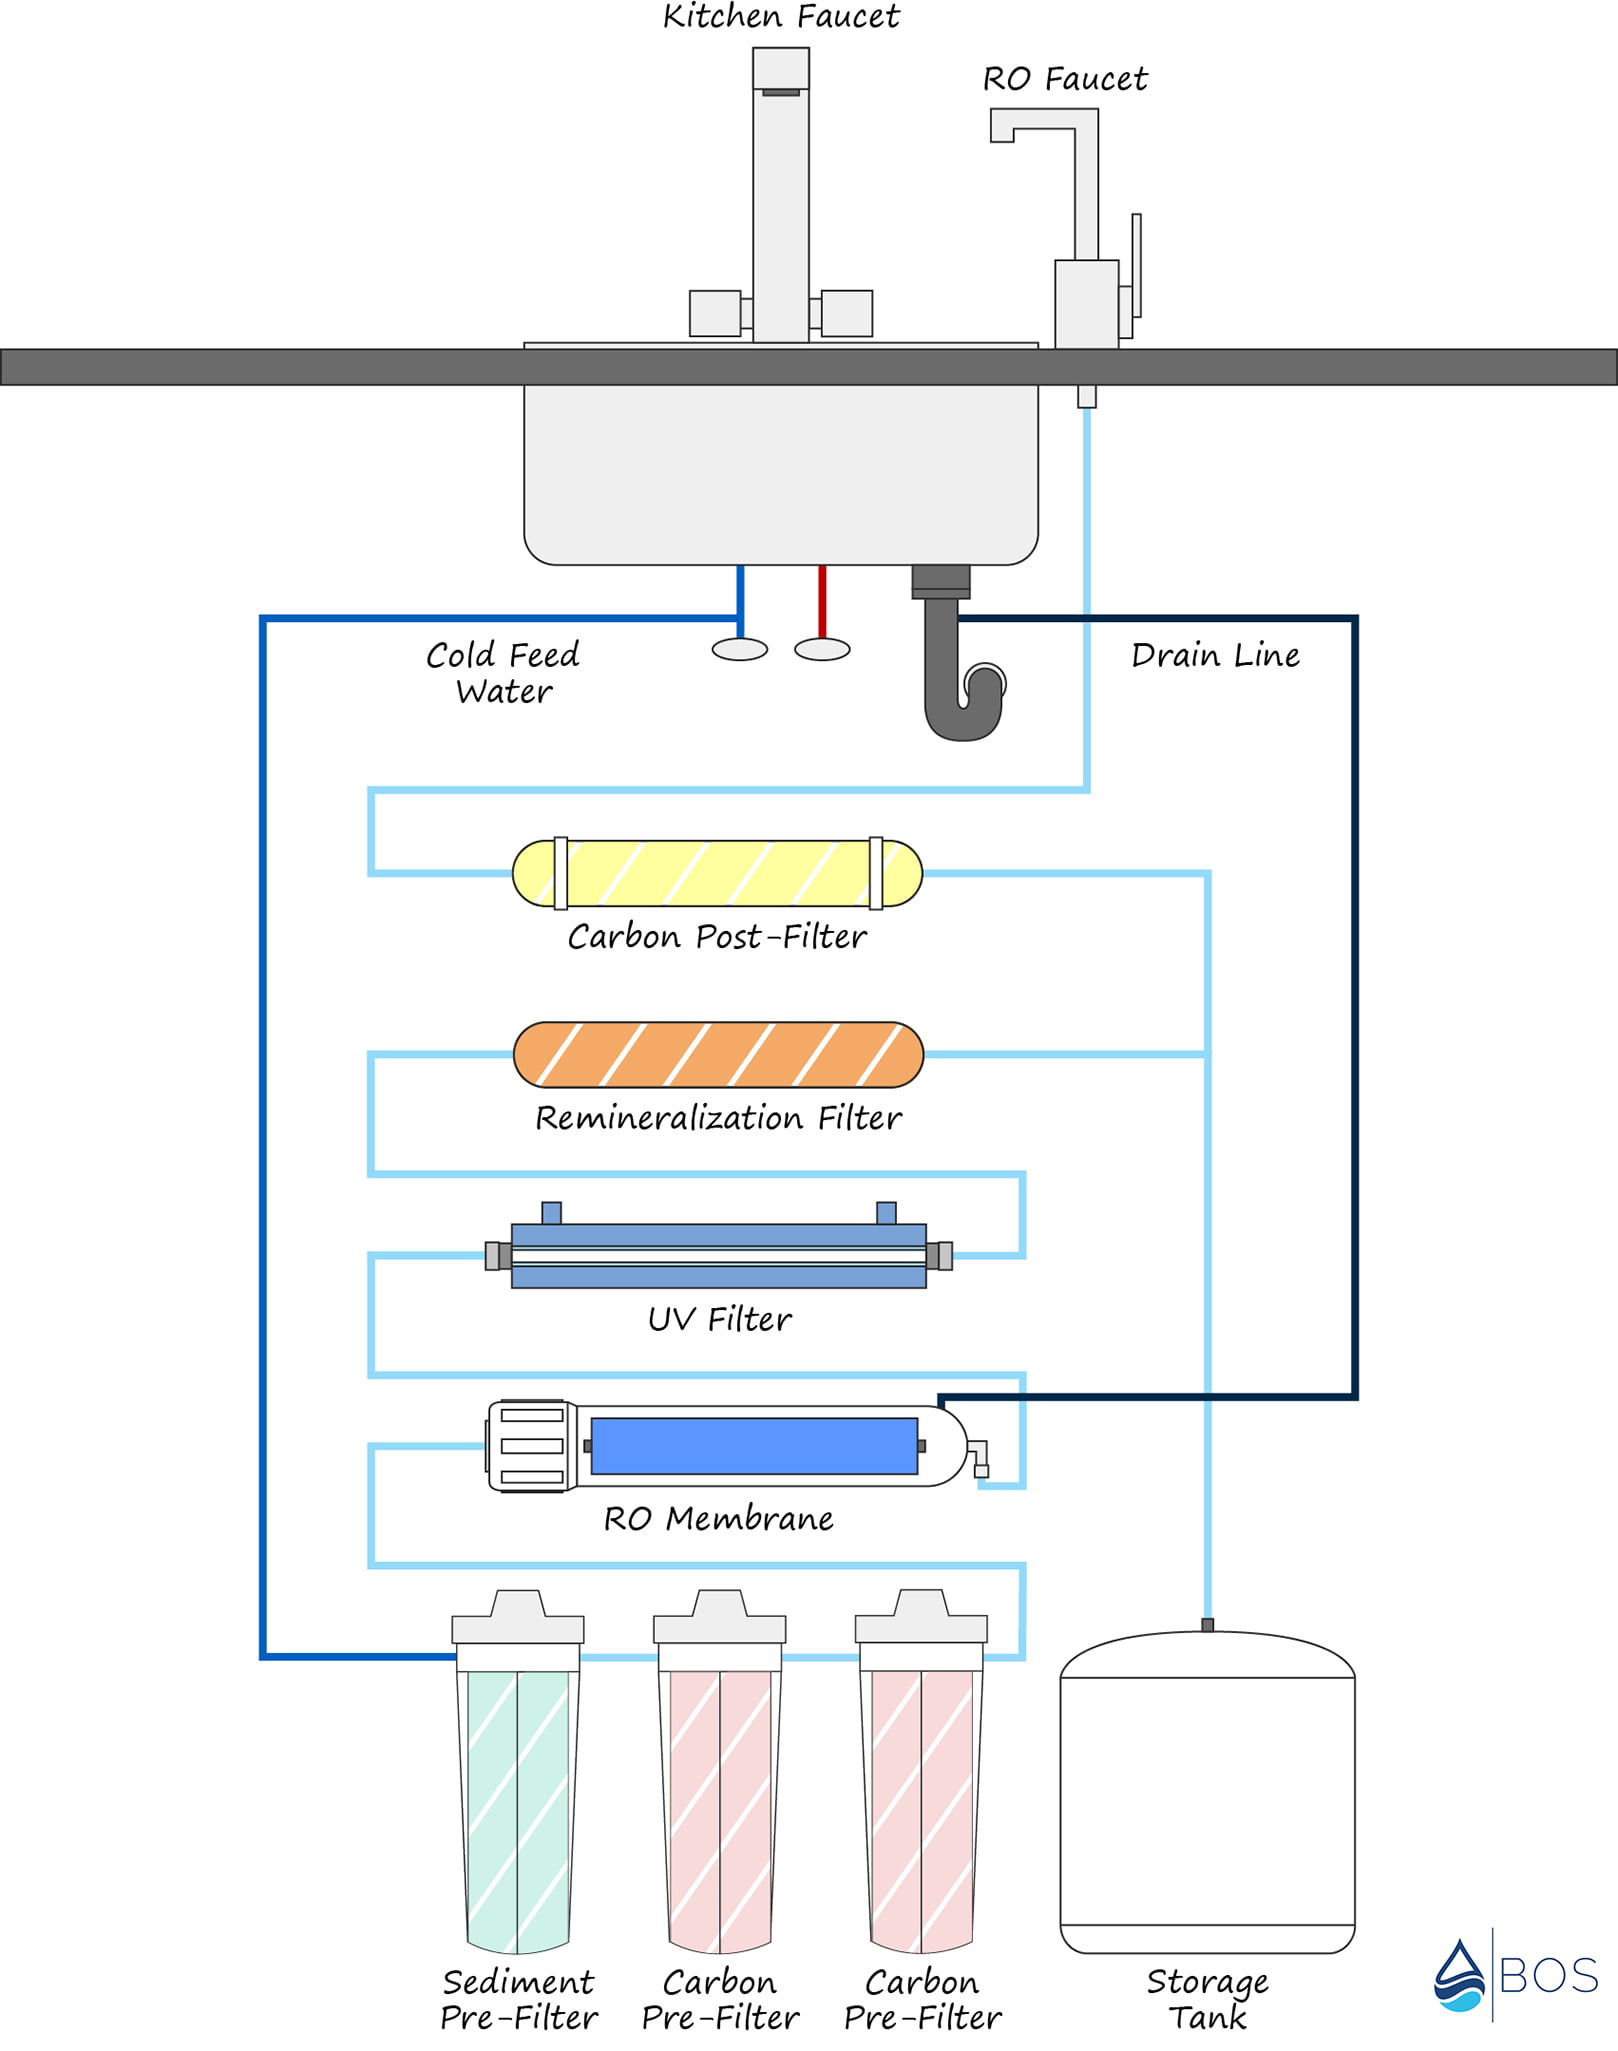
Take the water inlet from the urinal valve under the sink using the inlet and tee valve provided in the package with the device and connect it to the first “glass” housing.
For the tank, take the outlet from the tee with the lid on the top of the device.
The last step is to connect it to the consumption valve on the sink.
Take the sewage outlet from the small capsule under the membrane filter.
The most important issue is draining the black water:
The most important issue during installation is draining the black water from the second filter, which should never enter the membrane. To drain the black water, you must open the filter chamber number 3 (white on the lower left), then open the inlet valve of the device and turn on the device. Place a transparent container such as a pitcher under the opened chamber cap until about 6 liters of black water are released. After the water becomes clear, close the inlet and turn off the device, then close the chamber in place and restart the device and enjoy drinking purified water.
Membrane filter:
The membrane filter (which is usually blue) will be sent to you with the device. Be sure to install the membrane filter correctly into its housing (the white housing installed at the top of the device).
Blue mixing valve on the device known as the mixer valve:
Please always keep this closed, except when the water tastes bitter due to its extreme purity
At that time, open it very slightly, about one or two millimeters, so that the purified water from the membrane mixes with the water after filter 3 “pre-treatment”.
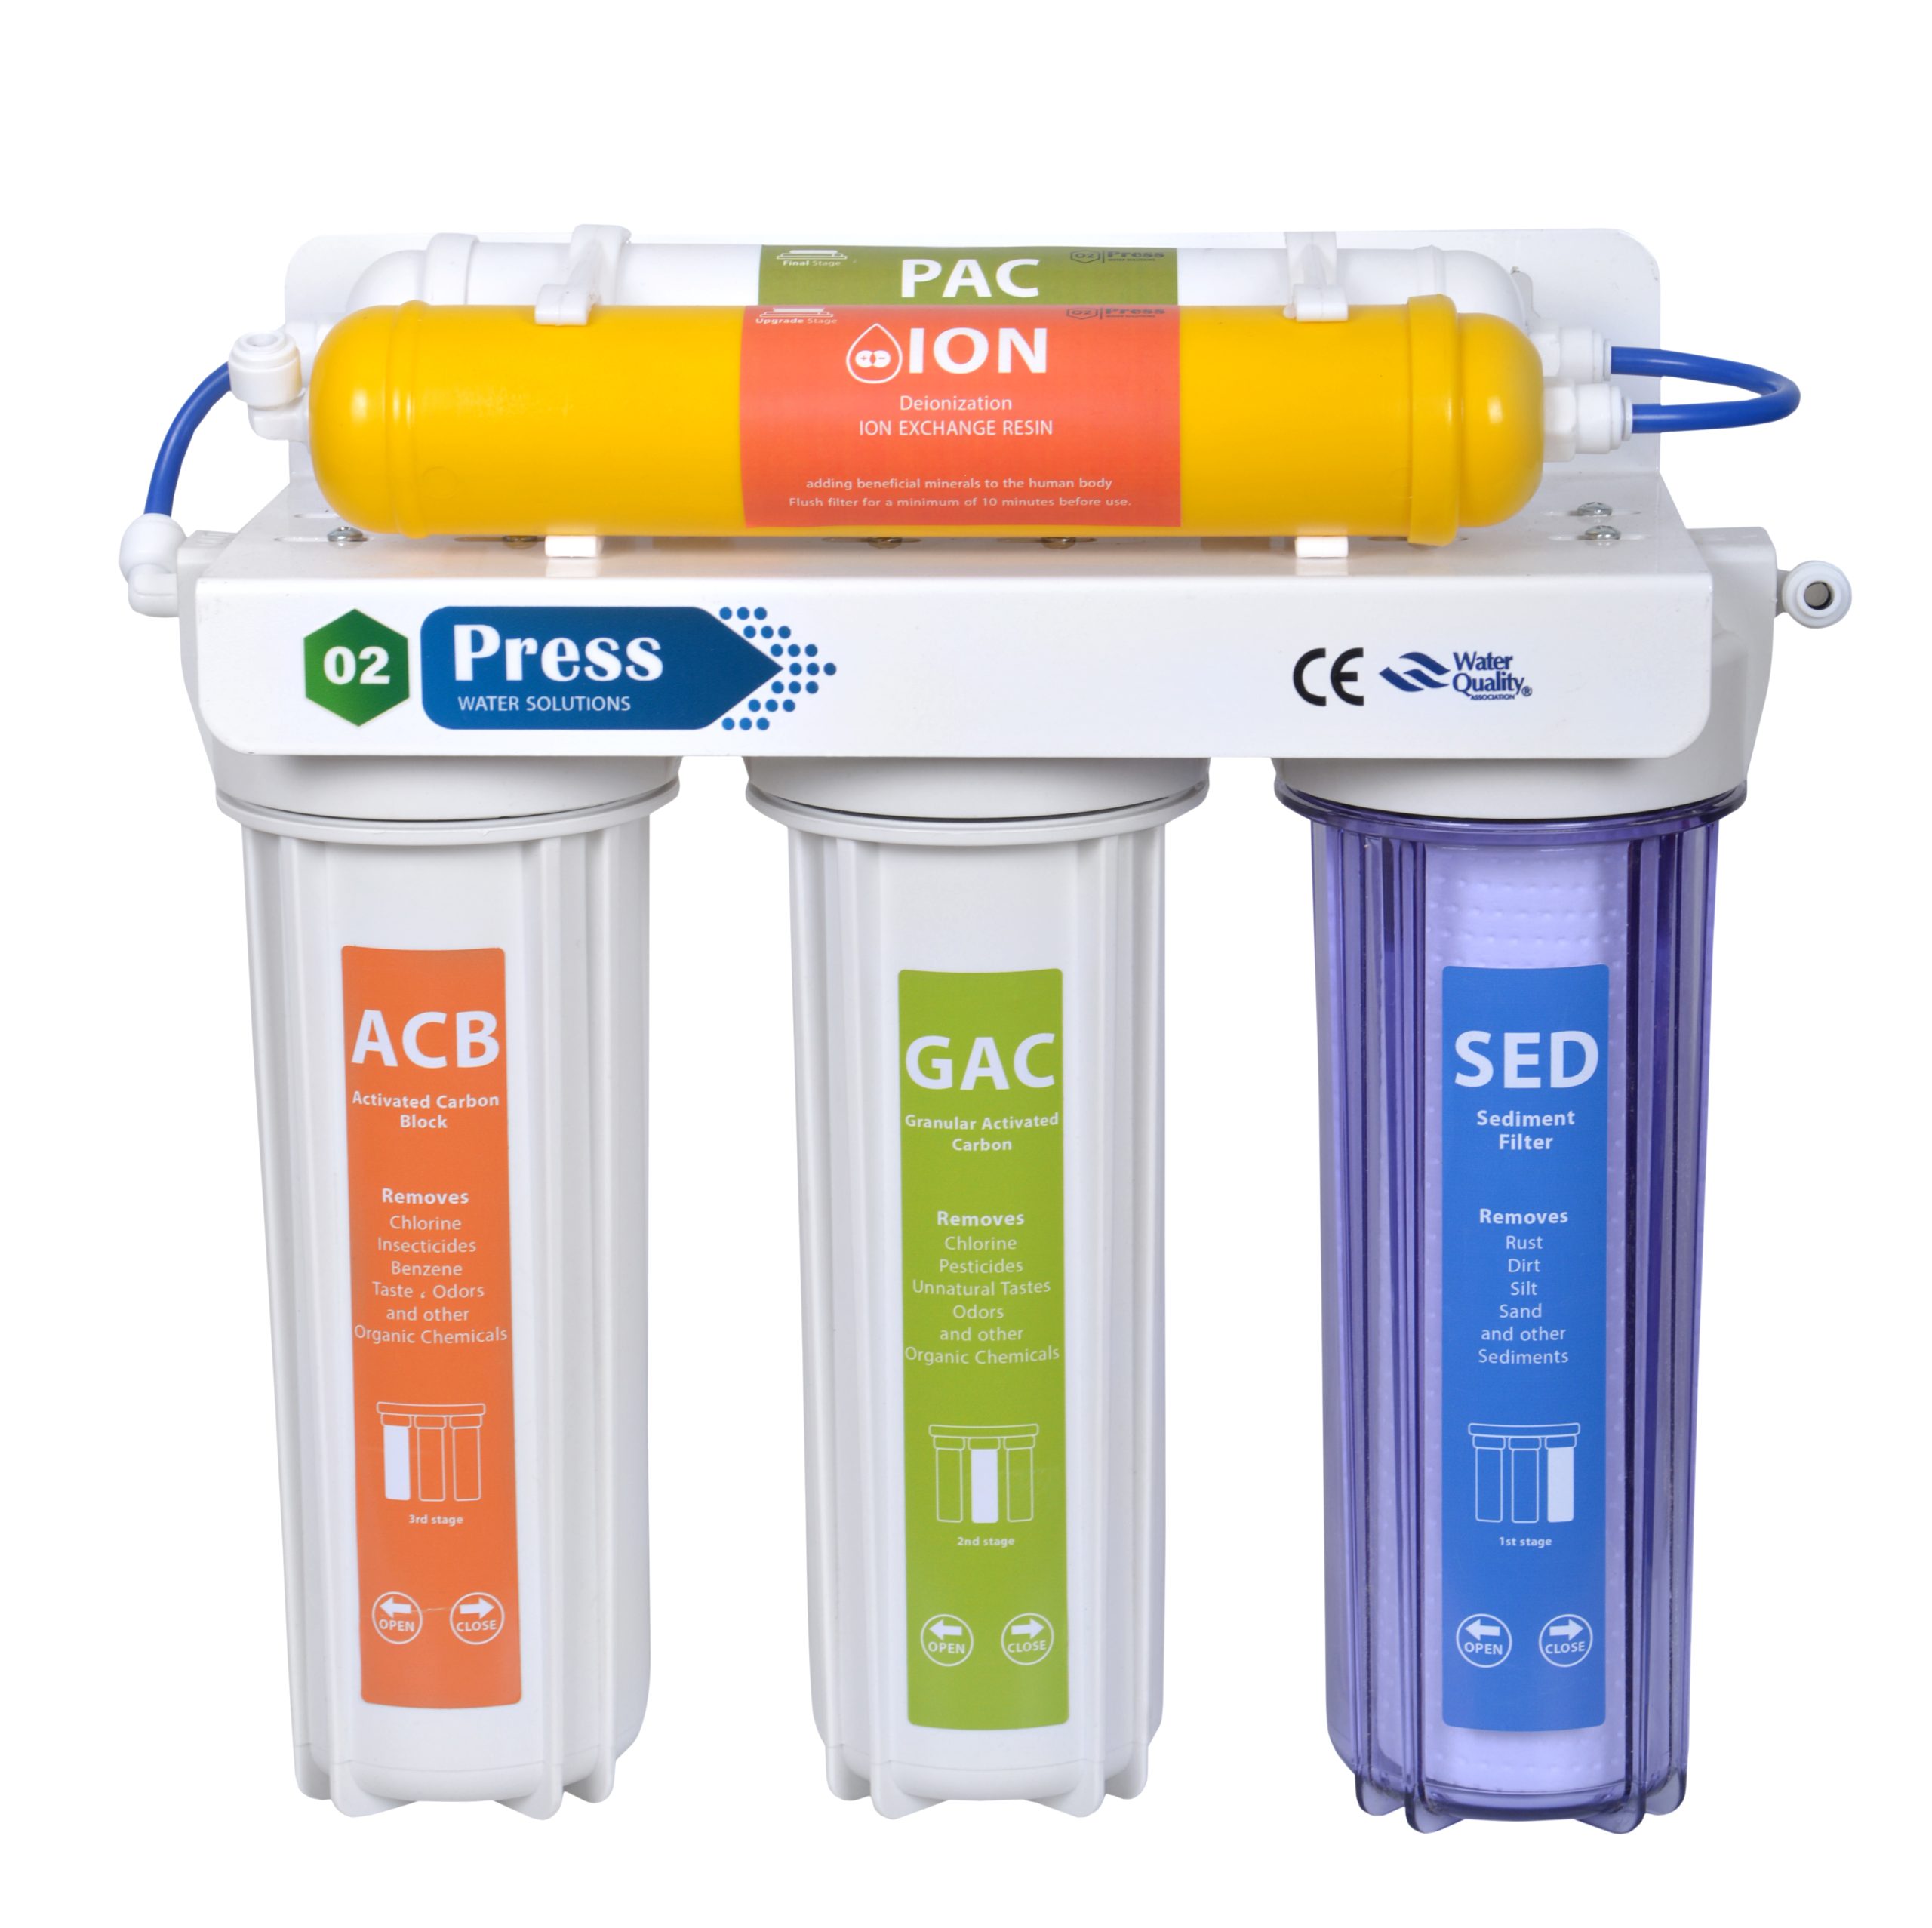
A brief explanation of the third filter of the device:
The third filter in new devices “meaning a dry membrane that has not yet been started”, must be of the fiber type,
This is 100% fundamental and is to protect your membrane from the possible passage of carbon particles “even after the black water is removed from the second filter”, and its entry into the not completely wet layers of the membrane
Remember that whenever you try to replace the membrane filter, place the third fiber type filter in its chamber in the same way
It should be noted that when replacing periodic filters, it is okay to use a carbon block filter in the third chamber.
The final step:
To achieve the desired quality, the tank usually needs to be emptied twice. To do this, wait twice for 1 hour each time until the tank is full, then open the tap on the sink and allow the tank to drain completely. “The sign that the tank is empty is that the water on the sink comes out of the tap on the sink without pressure and in a very thin drop.
The third time the tank is filled, the water is ready to drink.
If you have any questions at any stage, you can get help from our technical colleagues by taking a picture of the same stage and sending it to the site support on the WhatsApp application.
⏪◀ Send a message on WhatsApp ▶⏩
Share